How I use Aeon Timeline with Scrivener, Part 2
Last week I gave some general tips on using Aeon Timeline - this week I want to go into a bit more depth on my own process, specifically how I set up a new novel project using Timeline and Scrivener.
First up, I should point out that I'm what editor Ellen Brock calls a Methodological Pantser; that is, I like to start with a skeletal plot outline (I use a cross between 'Save The Cat' and James Scott Bell's '14 Signposts') and then discovery-write my way from one plot point to the next. If you work differently, some of the notes below might help you, but some might not!
Note also that I don't always follow this process exactly! That's particularly the case for the first book in a new series, when my process is a lot more messy - it usually involves a preliminary stage where I write a very rough draft and then throw a lot of the ideas out of the window because they're not working. The further I get into a series, the more I know about the characters and world and therefore the easier it is for me to outline a story and then stick to it.
Initial planning #
For NaNoWriMo 2022 I'm going to be drafting the second book in my new fantasy mystery series, Winterglass & Thorne (title TBA). For this series I start the planning process with the book title, which always refers to the heist/caper part of the plot - it saves a lot of bother trying to come up with a good title after the book is written! Then I brainstorming ideas for said plot, plus some kind of mystery for my heroine, DI Freya Gitasdottir, to investigate.
For this project, my outline began with a spreadsheet consisting of 30 rows (1 per chapter), to which I added my story beats, divided across two columns since I have two main plot strands in each book. This stage helps me to ensure that both main characters have a decent share of the novel. However even with some pretty colour-coding, it's not easy to see how the stories will play out, still less how they intersect one another.
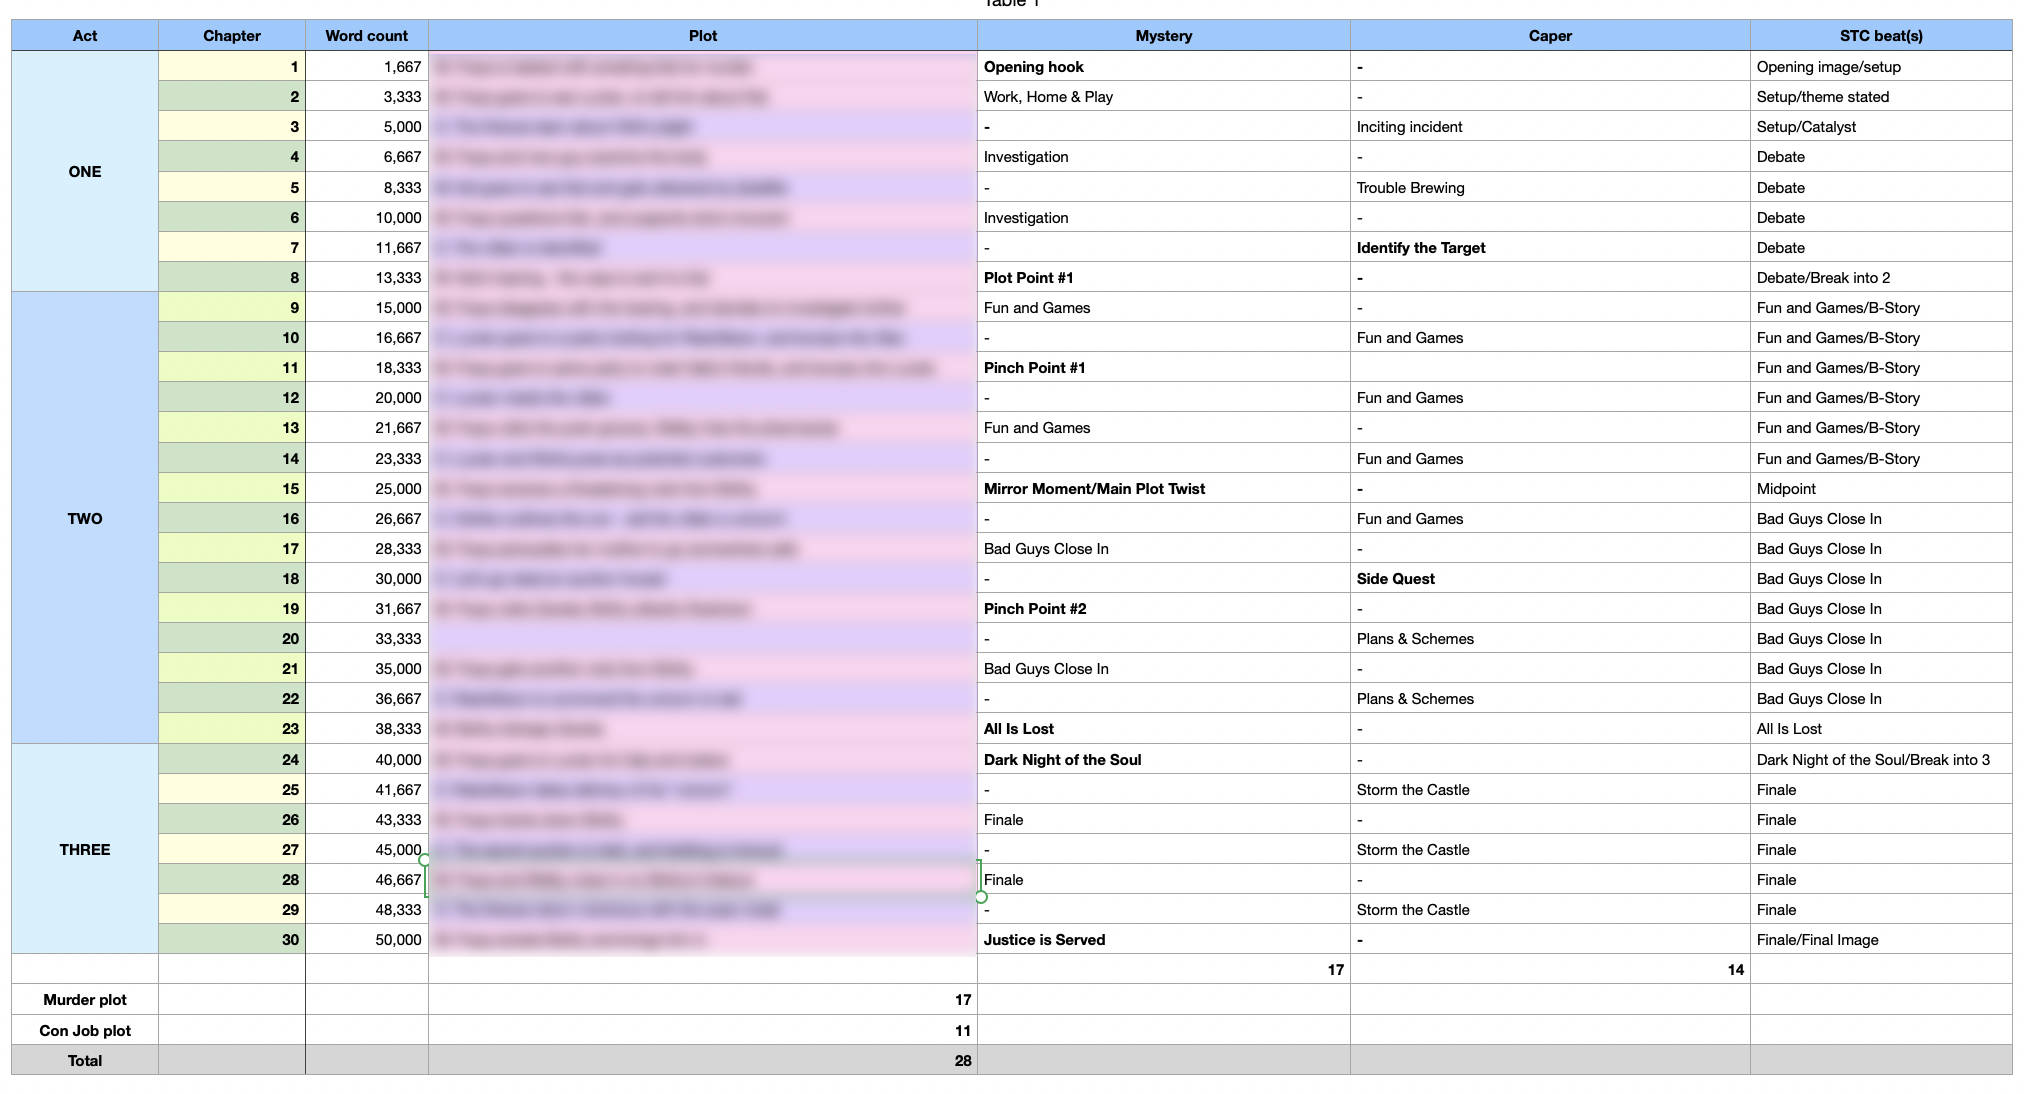
I used this skeletal outline to write short synopses of my main storylines, which helped to explain some of the logic behind the beats, but again it's hard to see how it all fits together. I've therefore decided that my next step will be to use Timeline's mindmapping view to create a visualisation of my story.
Mindmapping #
I'm probably going to need two separate mindmaps for this book's plots, but I'm starting with the mystery plot (Freya's storyline), since that's clearest in my mind right now. It starts in a pretty classic way with the discovery of the body, but I've blurred out titles that involve spoilers:
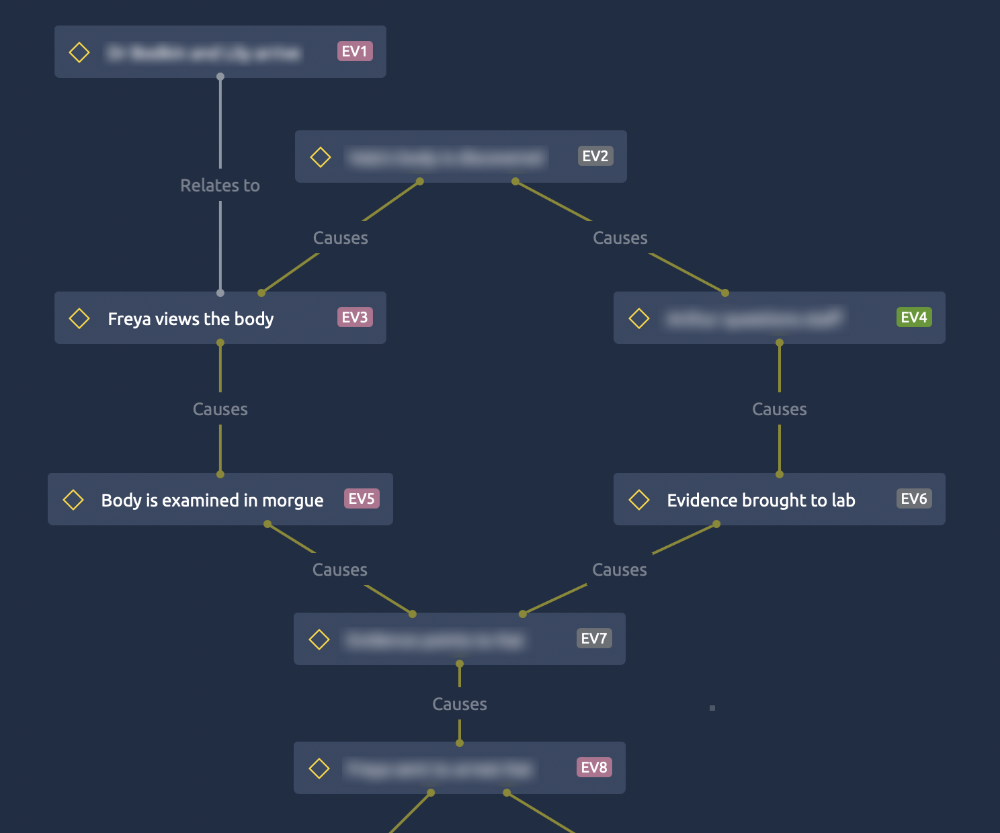
The great thing about the mindmap is that:
- it auto-populates your event spreadsheet, so you can add dates and times later
- not everything on it has to be a scene in your story
In fact, unless and until I add each item to the Narrative view, it won't be synced to Scrivener's Manuscript folder. That way, I can include events in the logical flow without having to show them - essential for a mystery!
The pink and green Event nodes are the ones I already want to include as scenes - I've labelled them with the characters' colours. Grey nodes are either background information or items I'm not sure will need a scene.
Creating the narrative #
The mindmap is a great starting point, but now I need to add the scenes to the Narrative view. At this point, they can become documents in the Manuscript folder once I sync them to Scrivener, and I can start writing!
In the Narrative view, I can add folders to represent acts and chapters, then bring in the events I already created, using the dropdown menu (as you add them to the narrative, they disappear from the list, to prevent duplicates).
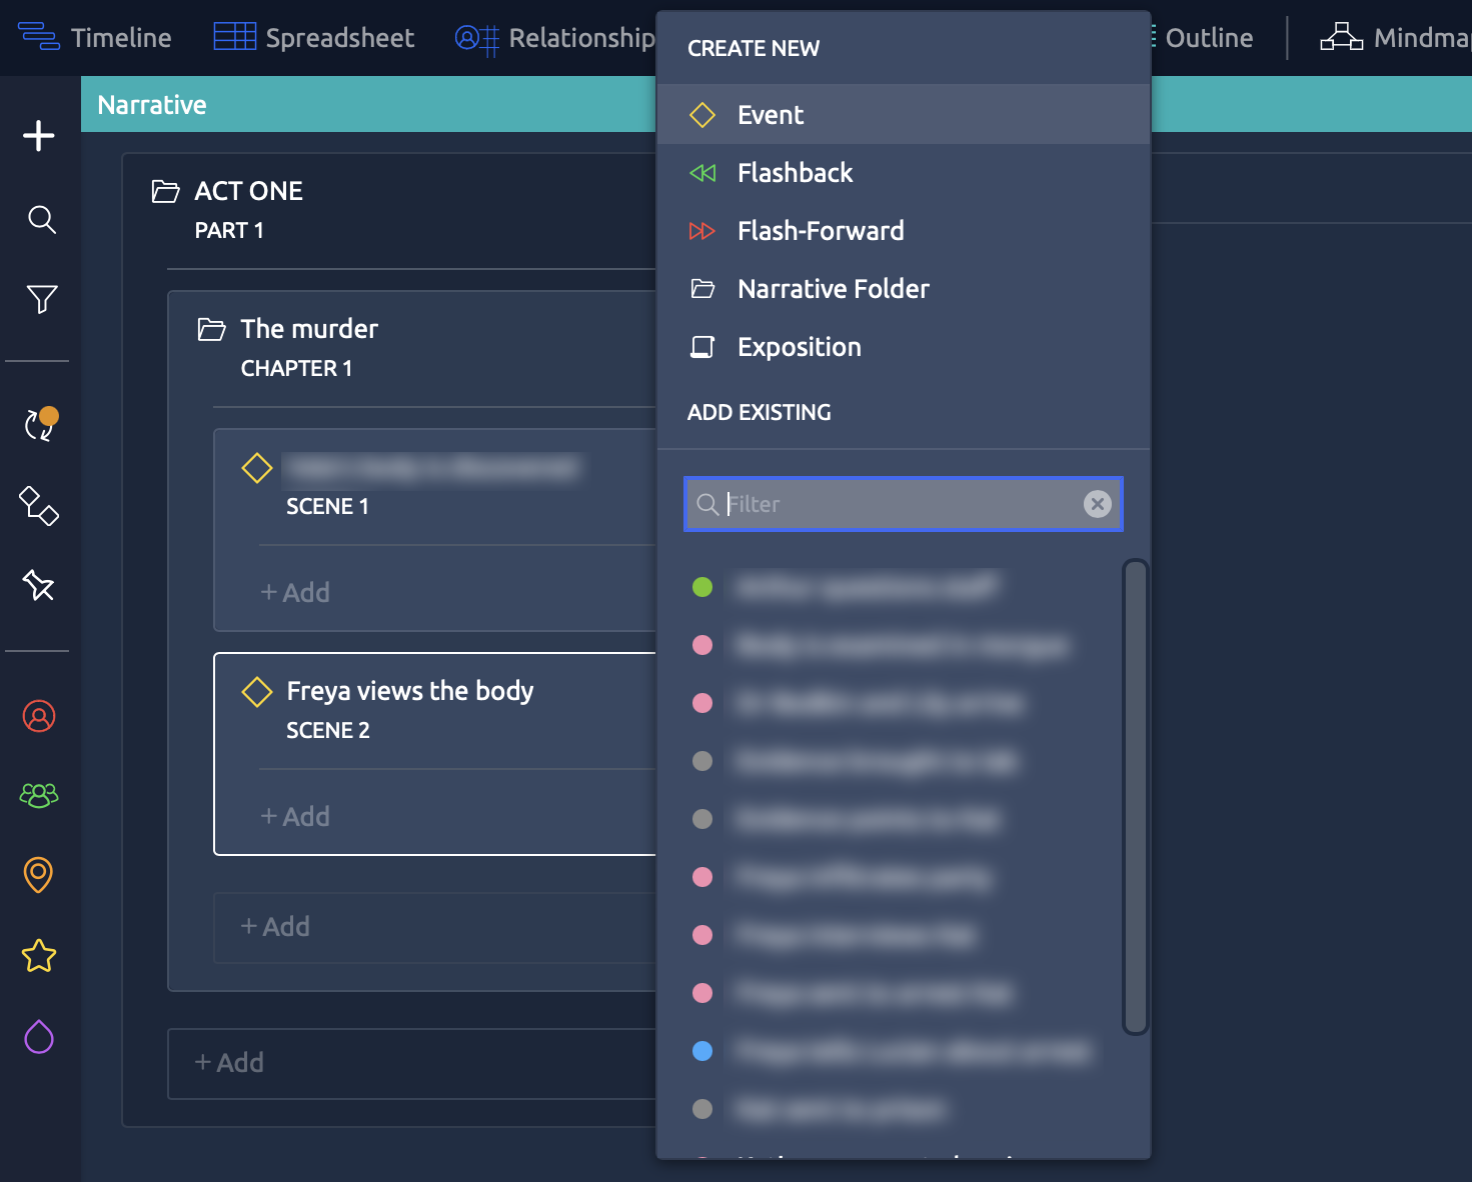
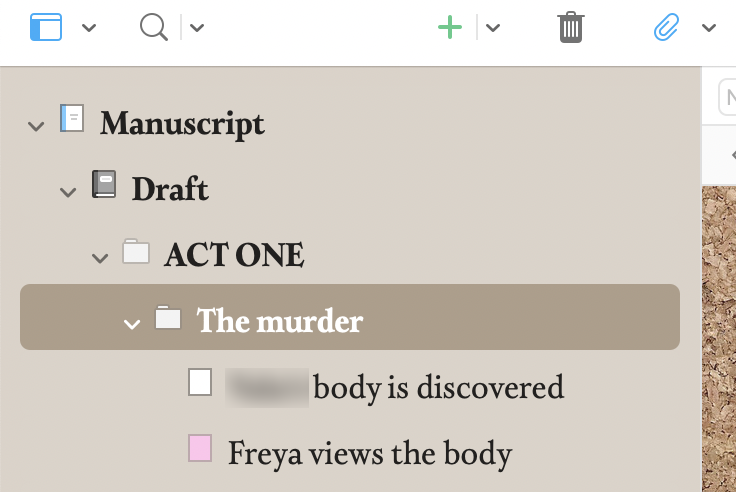
As you can see, the Sync icon on the left has an orange dot, which means there are differences between my Timeline and my Scrivener project. Once I've opened the sidebar and clicked on "Sync now", new documents are created in Scrivener's Binder.
Of course if you add new scenes from within Scrivener, you'll need to sync them back to Timeline before you work in that application, otherwise you'll get conflicts. My template, below, includes a Scene template with the correct metadata, so you don't have to worry about breaking your sync between the two applications.
In conclusion #
That's really all there is to it! I usually also create a paper copy of my scenes on index cards, as they're easier to refer to while typing, but you can manage the whole process just in software.
Caveat: you can't sync between Scrivener and Timeline on iOS, as the system doesn't allow it - so make sure you're all synced up before you set out with your iPad for a coffee shop write-in!
Free Scrivener template #
You can download a free Scrivener template here - it contains the metadata fields you will need, as well as some character and scene templates that I find useful. Just open it and click "File -> Save As Template" to add it to your Scrivener template library.